Set up your wallet and bridge assets
Cross-chain restaking requires holding assets on the source chain, typically Ethereum, before delegating to a restaking protocol like EigenLayer. Moving funds across blockchains introduces bridge risk that is just as critical as protocol security. A compromised bridge can result in total capital loss, regardless of how secure the restaking contract is.
Connect a compatible wallet
Install a non-custodial wallet such as MetaMask or Rabby. Securely back up your seed phrase offline and never share private keys. Connect your wallet to the restaking dashboard to verify it can read your Ethereum balance.
Choose a reliable bridge
Select a bridge with a proven security record and high liquidity. Major protocols like Stargate, Wormhole, and Celer cBridge are widely used for moving assets to Ethereum. Verify the bridge URL through the official restaking protocol’s documentation to avoid phishing sites. Check recent audit reports for the bridge to ensure no known vulnerabilities exist.
Transfer assets to Ethereum
Initiate the bridge transaction from your source chain (e.g., Solana, Arbitrum, or Base) to Ethereum. Double-check the destination address and network selection. Bridge transactions can take several minutes to hours depending on network congestion and security finality. Wait for the transaction to confirm on the destination chain before proceeding to the restaking interface.
Download MetaMask or Rabby from official sources. Back up your seed phrase offline. Connect the wallet to your browser and verify your Ethereum network settings are correct.
Navigate to the official documentation of your chosen restaking protocol. Identify the recommended bridge partners. Cross-reference the bridge URL with official audit reports from firms like OpenZeppelin or Trail of Bits to ensure safety.
Select your source chain and Ethereum as the destination. Enter the amount to bridge. Confirm the transaction in your wallet. Wait for the transaction to finalize on the Ethereum blockchain before proceeding.
Select a liquid restaking token provider
Choosing an LRT provider is the most critical decision in cross-chain restaking. You are entrusting your capital to a protocol that manages both staking yields and bridge security. A mistake here exposes your principal to smart contract vulnerabilities and cross-chain bridge exploits.
Verify that the LRT supports your target chains. Not all providers offer uniform coverage across Ethereum, Solana, or Layer 2s. Audit their security model by looking for independent reports from firms like Trail of Bits or OpenZeppelin, and check for a history of incident response. High yields often mask higher bridge risks; prioritize protocols with transparent slashing conditions and robust insurance funds.
Use the comparison below to evaluate the top providers based on current security frameworks and chain support.
After selecting a provider, monitor their TVL (Total Value Locked) and audit status. A sudden drop in TVL can signal a loss of confidence, while a new audit report confirms ongoing security diligence.
Deposit and restake on the source chain
Before bridging, lock your staked assets into the Liquid Restaking Token (LRT) contract on the source chain. This step activates the restaking mechanism, converting base staking rewards into a restakable asset. This is the "ticket" that will later travel across chains.
The specific contract address and supported assets vary by protocol. Always verify the contract address against the official documentation. Using a wrong address or interacting with a phishing site is the most common way to lose funds in cross-chain operations.
1. Connect your wallet
Open your wallet interface and connect to the source chain network (e.g., Ethereum, Solana, or the specific L1/L2 where you hold the staked asset). Ensure your wallet is on the correct network to avoid transaction failures.
2. Approve the token spend
Navigate to the deposit interface. Approve the LRT contract to spend your staked tokens (e.g., stETH, rETH, or native staked assets). This is a one-time approval per token type, but always check the allowance amount and gas fees.
3. Deposit into the LRT contract
Enter the amount of staked assets you wish to restake. Confirm the transaction details, ensuring the destination contract matches the official protocol docs. Once confirmed, you will receive the corresponding LRT tokens (e.g., ezETH, rsETH) in your wallet.
4. Verify receipt
Check your wallet balance to confirm the LRT tokens have arrived. These tokens represent your restaked position and are the asset you will bridge to the destination chain. Do not proceed until you see the LRT tokens, not just the original staked asset.
Security Warning: Cross-chain restaking introduces bridge risk. As noted in recent DeFi analyses, some restaking protocols avoid cross-chain exposure entirely to mitigate this risk (Symbiosis, 2025). If you choose a cross-chain path, use audited bridges and verify every contract address.
5. Prepare for bridging
Once you hold the LRT tokens, you are ready to bridge them to the destination chain. Ensure you have enough native gas tokens on the destination chain for the upcoming restaking transaction. Some protocols offer native bridging integrations that simplify this step.
Bridge LRTs to target chains for yield
Moving your Liquid Restaking Tokens (LRTs) to chains like Arbitrum, Optimism, or Base unlocks higher yields and deeper liquidity. However, this process introduces significant bridge risk. In April 2026, attackers drained 116,500 rsETH (~$292M) from KelpDAO’s LayerZero bridge by forging a cross-chain message. This incident highlights that the bridge is often the weakest link in the restaking stack.
Follow these steps to move your LRTs securely to a target chain.
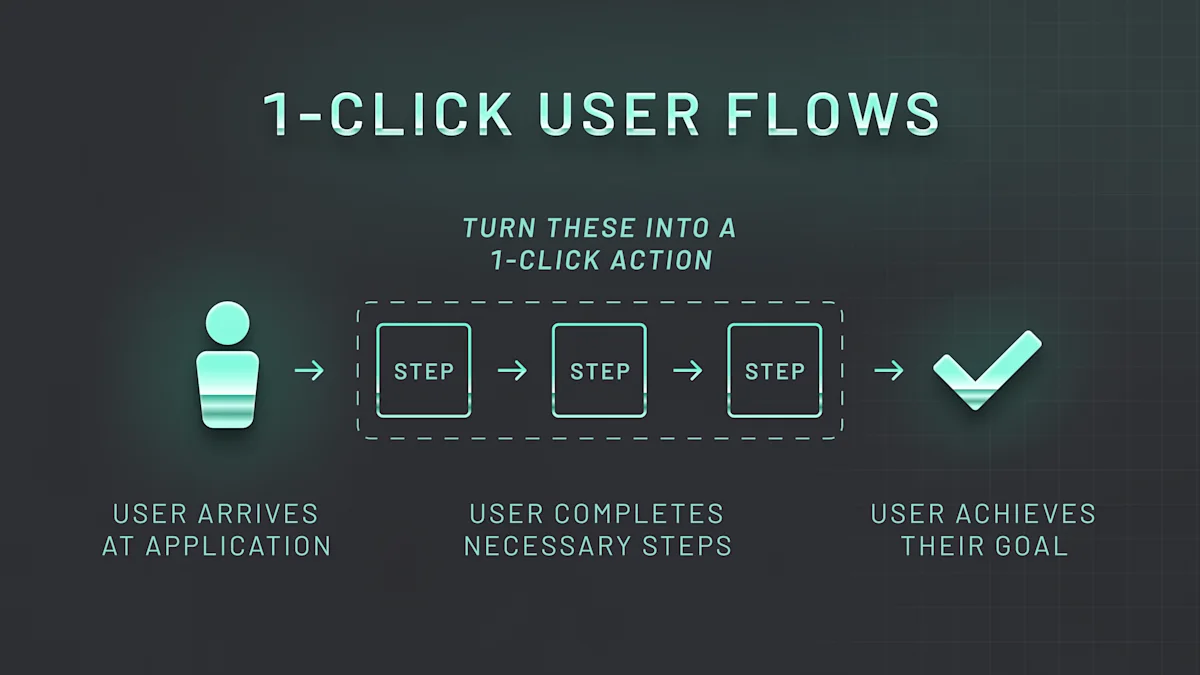
Before initiating a transfer, confirm that your specific LRT (e.g., rsETH, ezETH, or swETH) is supported on the destination chain. Not all LRTs have native bridges to every L2. Check the LRT protocol’s official documentation or supported networks page to avoid unsupported token transfers.
Navigate to the LRT provider’s official bridge interface or a reputable cross-chain aggregator like Stargate or Wormhole. Avoid third-party links from social media or unverified forums. Double-check the URL to ensure you are on the official domain, as phishing sites often mimic bridge interfaces.
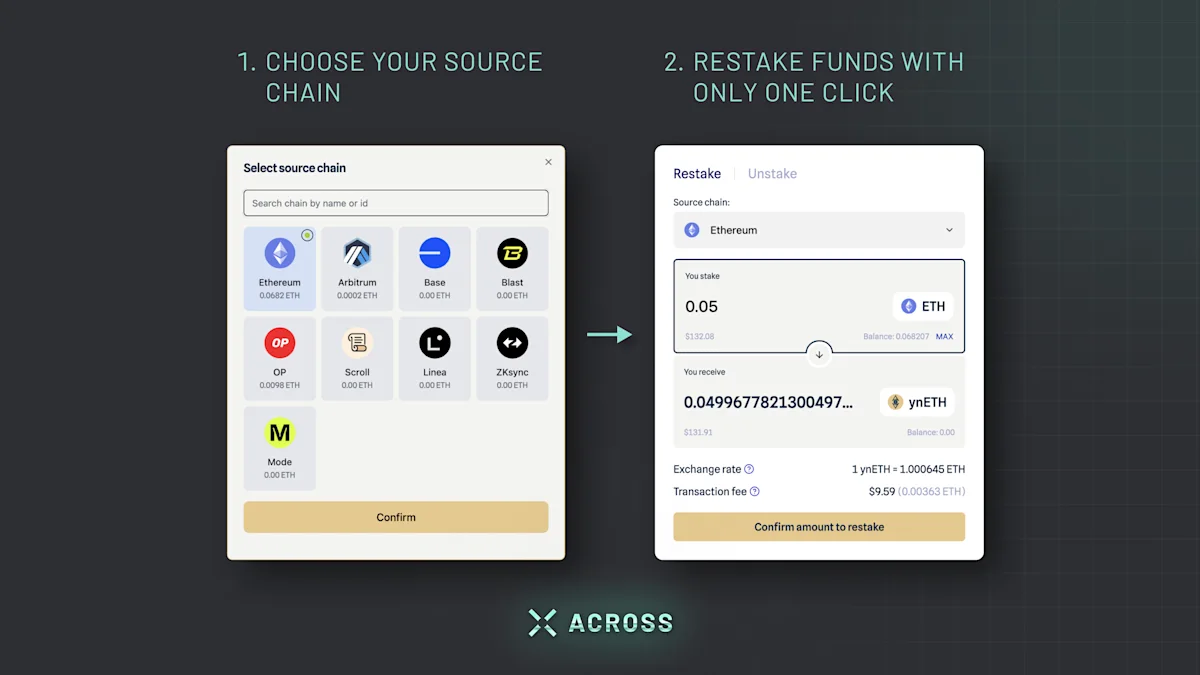
In the bridge interface, select the source chain where your LRTs currently reside and the target chain where you want to access yield. Ensure you have enough native gas tokens on the source chain to cover transaction fees. Some bridges require gas on the destination chain, so keep that in mind.
Input the amount of LRTs you wish to bridge. The interface will display estimated fees, including bridge costs and network gas fees. Compare these fees across different bridges if multiple options are available. Be aware that bridge fees can fluctuate based on network congestion and liquidity depth.
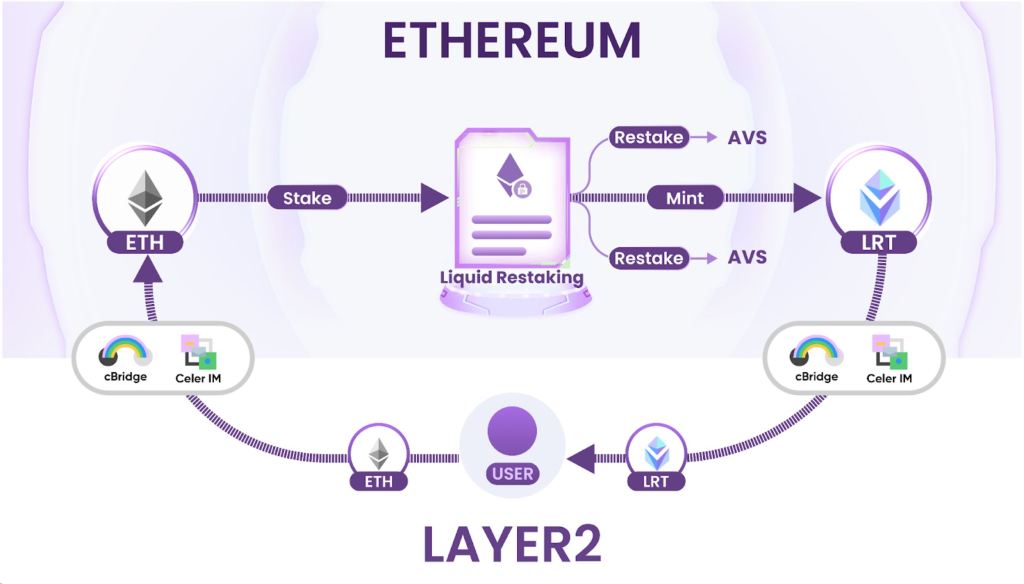
Review all details, including the recipient address and target chain. Confirm the transaction in your wallet. After signing, monitor the transaction status on a block explorer. Cross-chain transfers can take from a few minutes to several hours depending on the bridge and network conditions. Do not initiate a second transfer until the first is confirmed complete.
Monitor slashing and bridge security
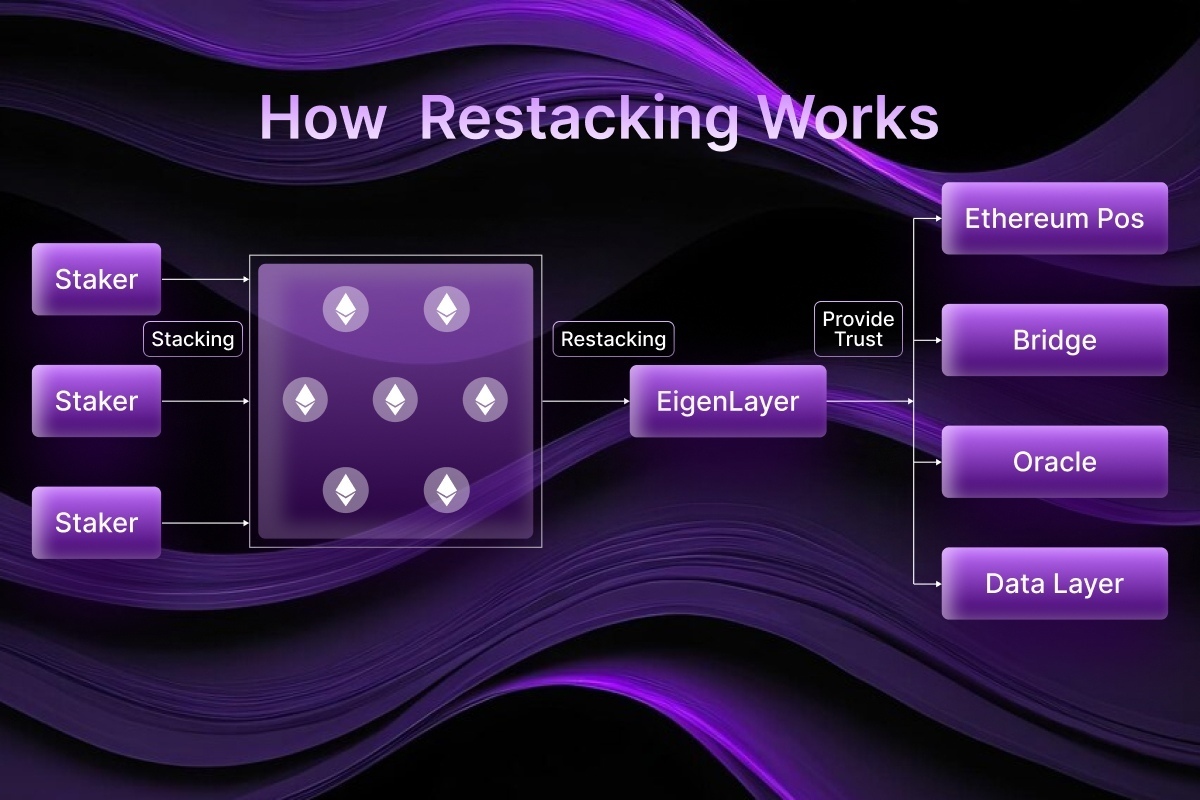
Cross-chain restaking amplifies yield by distributing risk, but it also multiplies the attack surface. When you restake assets across chains, you are no longer just trusting a single validator set; you are trusting the bridge infrastructure connecting them. A failure on one chain can cascade into a total loss on another. This section outlines the active monitoring steps required to protect your positions from slashing events and bridge vulnerabilities.
1. Track validator performance and slashing signals
Slashing occurs when a validator behaves maliciously or goes offline. In a cross-chain environment, a slashed validator on Ethereum can invalidate restaked positions on L2s or sidechains that rely on its attestation. Do not assume your L2 position is safe just because the local chain is stable.
- Set up real-time alerts: Use block explorers like Etherscan or Dune Analytics dashboards to monitor your staked validator indices. Configure alerts for "slashed" status or excessive downtime.
- Monitor consensus layers: For restaking protocols like EigenLayer or KelpDAO, track the
slashingEventscontract logs. If a validator is slashed, the protocol may pause restaking rewards or require a manual claim to mitigate further damage. - Check L2 bridge status: Ensure your L2 bridge contracts are not under maintenance or experiencing latency. A delayed bridge can prevent you from exiting a position before a slashing event propagates.
2. Audit bridge security and message integrity
Bridges are the most common point of failure in cross-chain restaking. Attackers often forge cross-chain messages to drain liquidity. The April 18, 2026 incident involving KelpDAO serves as a critical case study: attackers drained 116,500 rsETH (~$292M) by forging a cross-chain message under a 1-of-1 LayerZero configuration [src-serp-8]. This loss highlighted the danger of relying on weak signature schemes for high-value assets.
- Verify signature schemes: Check the bridge’s documentation to understand its security model. Avoid bridges that use single-signature schemes (1-of-N) for critical operations. Prefer bridges with multi-sig or threshold signature schemes (TSS) backed by reputable audits.
- Review audit reports: Before bridging assets, read the latest security audit reports from firms like OpenZeppelin or Trail of Bits. Look for specific mentions of "cross-chain message validation" and "replay protection."
- Monitor bridge TVL and volume: Sudden drops in Total Value Locked (TVL) or unusual volume spikes can signal an impending exploit. Use DeFi Llama or similar trackers to monitor bridge health.
3. Implement a response protocol
Monitoring is useless without a plan. If you detect a slashing event or bridge vulnerability, act quickly to minimize losses.
- Pause restaking: If a validator is slashed, pause any new restaking activities in the affected protocol. Check if the protocol offers a "slashing insurance" fund or if you need to manually claim your share of the slashed assets.
- Withdraw from vulnerable bridges: If a bridge is compromised, withdraw your assets immediately if possible. If the bridge is frozen, monitor official announcements for recovery procedures.
- Rebalance positions: After a crisis, reassess your cross-chain exposure. Consider diversifying across multiple bridges and validators to reduce single-point-of-failure risk.
Key Takeaways
- Slashing on Ethereum can impact restaked positions on L2s; monitor validator status across all chains.
- Bridge security is paramount; avoid bridges with weak signature schemes like 1-of-1 configurations.
- The KelpDAO $292M loss demonstrates the catastrophic risk of forged cross-chain messages.
- Have a clear response protocol for slashing and bridge failures to minimize losses.
Final cross-chain restaking checklist
Cross-chain restaking amplifies yield but multiplies risk. Bridges are the most exploited vector in DeFi. Use this checklist to verify your setup before locking funds and to monitor positions actively.
No comments yet. Be the first to share your thoughts!