Choose your restaking layer
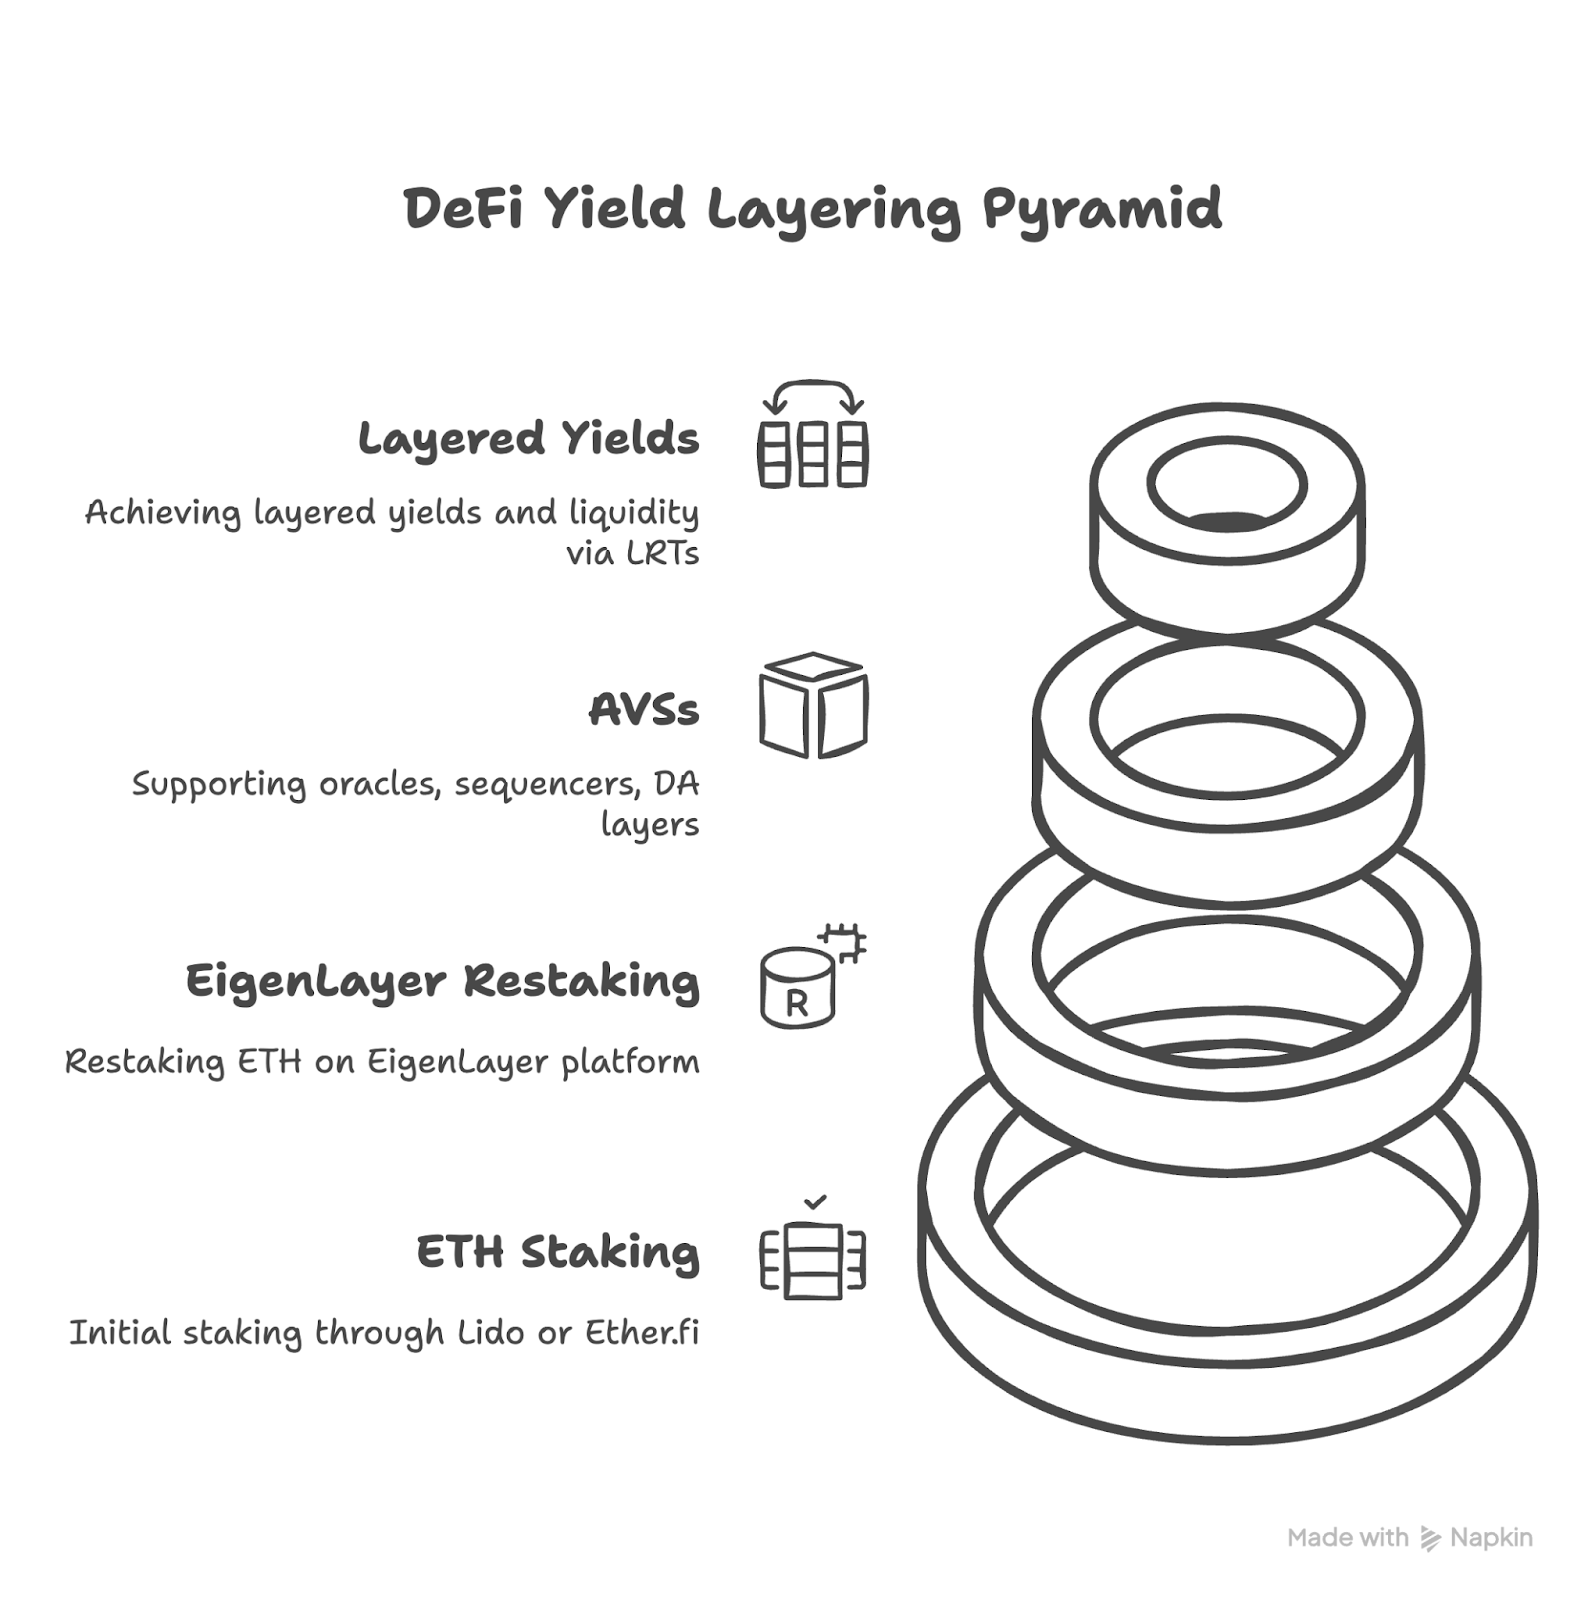
Before bridging assets across chains, you must select a primary restaking protocol that aligns with your security requirements and asset preferences. Restaking allows you to reuse staked assets, such as ETH, to secure additional decentralized services, effectively creating a "nesting doll" of yield and security layers src-serp-3.
Evaluate protocol security and audits
High-stakes capital requires verified code. Only use restaking protocols with at least one independent security audit from reputable firms. Look for protocols that have undergone formal verification and have a clear history of bug bounty programs.
Select your asset: ETH vs. BTC
Most established restaking protocols are built on Ethereum, making ETH the primary asset for restaking. However, if you hold BTC, you will need to wrap it (e.g., WBTC) or use a native BTC restaking layer. Consider the liquidity and bridge risks associated with wrapped assets versus native tokens.

Checklist for protocol selection
-
Verify independent security audits are complete and public.
-
Confirm the protocol supports your target asset (ETH/BTC).
-
Review slashing conditions and insurance mechanisms.
-
Check total value locked (TVL) and community activity for liquidity depth.
Bridge assets to the target chain
Before you can restake, your assets must physically move from the source chain (like Ethereum mainnet) to the destination chain where the restaking contract resides. This transfer relies on cross-chain bridges, which are among the most exploited attack vectors in crypto. High-stakes risk is real: in April 2026, Kelp DAO’s LayerZero-powered bridge was hacked for $292 million, highlighting the critical importance of bridge selection. Your security depends on choosing a protocol with a strong track record and robust security audits.
1. Connect your wallet to the bridge
Start by connecting your Web3 wallet to the bridge’s interface. Ensure you are on the official website to avoid phishing sites. Popular options include LI.FI for broad route coverage, deBridge for fast EVM-to-EVM execution, or Circle’s CCTP for native USDC transfers. Always verify the URL and contract addresses through official documentation.
2. Select source and destination chains
Choose your source chain (e.g., Ethereum) and the target chain where you plan to restake (e.g., Arbitrum or Base). The bridge will display available tokens and estimated fees. Be aware that some bridges may route your transaction through multiple hops if a direct path isn’t available, which can increase costs and time.
3. Approve token spend
If you’re transferring ERC-20 tokens, you’ll likely need to approve the bridge contract to spend your tokens. This requires an on-chain transaction and a gas fee. Double-check the approval amount and the contract address to ensure you’re not approving unlimited spending on untrusted contracts. For native assets like ETH or MATIC, this step is usually unnecessary.
4. Confirm the transaction
Review all details: the amount, the destination address, and the estimated arrival time. Once confirmed, the bridge will initiate the transfer. Monitor the transaction status via the bridge’s interface or a block explorer. Most transfers take between 2 minutes to 30 minutes, depending on the bridge and the chains involved.
Deposit into the restaking contract
With your assets bridged and sitting in your wallet on the target chain, the final step is locking them into the restaking protocol. This interaction is where your capital transitions from simple staking to active security provision. You are depositing into a specific vault or directly into an Actively Validated Service (AVS) contract, depending on the platform architecture.
Most modern restaking dashboards (such as EigenLayer or LRT platforms like Ether.fi) abstract the complex smart contract interactions into a unified interface. Your goal is to select the correct vault, input the amount, and sign the transaction that mints Liquid Restaking Tokens (LRTs) or restaking receipts. These tokens represent your share of the pooled security and your claim on future rewards.
1. Navigate to the restaking dashboard
Connect your wallet to the official restaking interface. Ensure you are on the correct network that matches your bridged assets. Verify the URL to avoid phishing sites, as restaking contracts handle significant value. Look for the "Restake" or "Deposit" button on the main dashboard.
2. Select the desired AVS or vault
Choose the specific protocol you wish to secure. Some platforms offer a "restaking vault" that automatically distributes your stake across multiple AVSs for diversified yield. Others allow you to select a single AVS, such as a decentralized oracle network or a data availability layer. Selecting a vault is generally safer for beginners, as it mitigates the risk of slashing from a single misbehaving service.
3. Input deposit amount and review terms
Enter the amount of bridged ETH or stablecoins you wish to deposit. The interface will display the estimated Annual Percentage Yield (APY) and any associated fees. Pay close attention to the "slashing conditions" summary. Slashing occurs if the validators you are supporting act maliciously or go offline; your staked assets can be partially or entirely confiscated. Understanding this risk is critical before proceeding.
4. Sign and confirm the smart contract transaction
Review the transaction details in your wallet. You will need to sign two distinct actions: first, an approval transaction to allow the contract to spend your tokens, and second, the deposit transaction itself. Confirm both signatures. Once the transaction is confirmed on-chain, you will receive LRTs in your wallet, representing your restaked position.
Cross-chain restaking involves bridge risks and smart contract vulnerabilities. Always use official links from the protocol's verified social channels. Never approve infinite token allowances unless required by the specific vault interface, and revoke approvals regularly using tools like Revoke.cash.
Monitor slashing and rewards
Cross-chain restaking is not a "set and forget" strategy. While your assets secure multiple networks simultaneously, they remain exposed to protocol-specific risks. You must actively monitor your position for two critical metrics: reward accrual and slashing events. If a validator operator misbehaves on any connected chain, your entire restaked balance can be penalized, often resulting in partial or total loss of principal.
Track reward accrual
Reward distribution varies significantly across chains due to differing network congestion and demand for security. Use the restaking protocol’s native dashboard to verify that rewards are accruing as expected. For example, EigenLayer displays real-time performance metrics for active operators. If rewards stall, check the specific chain’s status page for outages or operator inactivity before assuming a protocol error.
Watch for slashing events
Slashing is the most severe risk in restaking. It occurs when a validator fails to perform its duties or acts maliciously. Because your assets are pooled, a single failure can trigger penalties across all secured protocols. Set up alerts through your wallet or a third-party monitoring tool like DeBank to receive immediate notifications of any slashing events. If a slashing event occurs, you may need to exit the position quickly to limit further losses, though exit queues can delay this process.
Rebalance or exit if necessary
If you identify a high-risk operator or a persistent drop in yield, rebalancing is your primary defense. Most restaking platforms allow you to redistribute your stake to different operators with better track records. In extreme cases, such as a major bridge hack or protocol exploit, you may need to withdraw your assets entirely. Be aware that withdrawal periods can range from days to weeks, so maintaining some liquidity outside of restaking positions is advisable.
Common bridge and smart contract risks
Cross-chain restaking amplifies risk because your assets must traverse multiple protocols to reach their destination. Each bridge and validator set acts as a potential point of failure. If any link in the chain breaks, your staked capital is exposed to theft or permanent loss.
The most immediate threat comes from bridge vulnerabilities. Bridges are high-value targets for attackers because they hold large pools of locked assets. In April 2026, Kelp DAO’s LayerZero-powered bridge suffered a $292 million hack, highlighting how even established infrastructure can fail under attack [src-serp-4]. This incident underscores the necessity of verifying a bridge’s security track record before transferring significant sums.
Smart contract vulnerabilities present a second layer of danger. Restaking protocols often require complex interactions between native staking contracts and liquidity layers. A bug in the restaking logic or the bridge wrapper can lead to unexpected slashing events or unauthorized withdrawals. Unlike simple transfers, restaking positions are harder to unwind quickly when a vulnerability is discovered.
Always assume that cross-chain paths are temporary and experimental. Limit your exposure to amounts you can afford to lose, and prioritize bridges with longer operational histories and transparent audit records.
Cross-Chain Restaking FAQ
Addressing common questions about interoperability protocols helps you choose the right infrastructure for restaking. Below are answers to frequent queries regarding DEXs, transfer standards, and specific protocol examples.
Work through The to Cross-Chain Restaking

No comments yet. Be the first to share your thoughts!